


The Standard ACL and the Implicit Deny
CCNA Exam Success: Standard Cisco ACLs and the Implicit Deny
(Join the mailing list at the top of the page to be notified when my free CCNA ACL Mastery Video Boot Camp goes online in January 2017, right here on the TBA website!)
You simply must master ACL fundamentals to be successful in working with Cisco routers and switches. In your CCENT and CCNA studies, you’ll use them primarily to deny and allow traffic to enter or leave an interface. ACLs are also used to identify traffic that can or cannot use certain network services, such as NAT and PAT. You’ll also use ACLs to identify traffic for certain network security features. ACLs are everywhere in today’s networks!
The basic operation of every ACL is really the same. The top line of the ACL is examined for a match of a given value, typically a source and / or destination IP address. If no match is found, the second line is examined. If no match is found there, you know what happens next – the third line is examined for a match. This process continues until a match is found.
But what if there is no match, you ask? That’s where the impicit deny comes in. This is a “deny everything” statement that isn’t visible at the bottom of the ACL, but it’s there! For example, the following standard ACL matches on four different IP addresses. (Even if you haven’t seen a standard ACL before, keep going. An explanation of the command is coming, but the implicit deny concept is so important I really have to show it to you now.) Standard ACLs can match only on the source IP address, so naturally that’s the value we’re working with here.
The remarks in paren at the end of each line are mine and will not appear on the router.
R1(config)#access-list 1 permit 10.1.1.1 0.0.0.0 (matches 10.1.1.1 only)
R1(config)#access-list 1 permit 10.2.1.1 0.0.0.0 (matches 10.2.1.1 only)
R1(config)#access-list 1 permit 10.3.1.1 0.0.0.0 (matches 10.3.1.1 only)
R1(config)#access-list 1 permit 10.4.1.1 0.0.0.0 (matches 10.4.1.1 only)
Standard ACLs can only match on the source IP address of a packet, so that’s the value we’re working with here.
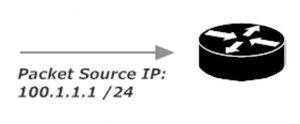
When that packet arrives on an interface with ACL 1 applied, the source IP address is compared against the ACL on a line-by-line basis. If the source IP address matches the first line , the appropriate “permit” or “deny” action is taken, and that’s the end of the entire process. If there is no match, the packet value is compared against the second line, and so forth, until a match is found.
I’m sure you noticed the source IP address of the packet is 100.1.1.1, and that is not a match for any line. What happens when we’re out of lines to match against the address?
R1(config)#access-list 1 permit 10.1.1.1 0.0.0.0 (no match)
R1(config)#access-list 1 permit 10.2.1.1 0.0.0.0 (no match)
R1(config)#access-list 1 permit 10.3.1.1 0.0.0.0 (no match)
R1(config)#access-list 1 permit 10.4.1.1 0.0.0.0 (no match)
When no match is found, the implicit deny is applied to the packet. The implicit deny is really an “invisible deny”; you won’t see a “deny any” line automagically added to your ACL, but it’s there! Since you don’t see it, it’s easy to forget about, especially if you’re new to ACLs. Forgetting about the implicit deny is the #1 reason for an ACL not giving you the desired results.
If a packet is not expressly permitted, it’s implicitly denied.
ACLs use wildcard masks to determine which part of an IP address should be examined for matches against ACL lines, and just as importantly, they indicate the part of the IP address that should not be so compared. We’ll have a look at wildcard mask logic in the next segment of this free CCNA ACL tutorial, coming on November 11, 2016!