CCNP ROUTE OSPF Lab: Building The Network, ABR Spotting
In this CCNP ROUTE OSPF tutorial / lab, we’re going to do everything from a little route redistribution and ABR/ASBR spotting to building stub and total stub areas. To do all that, though, we gotta build a network first! In this section, we’ll do just that while reviewing a few important OSPF success fundamentals.
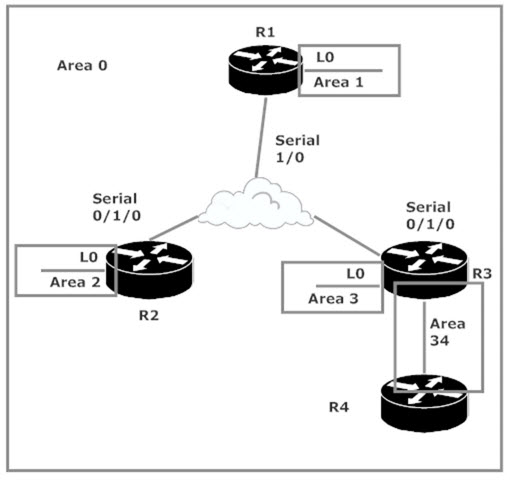
We know from previous studies that Area 0 is the backbone area of our OSPF network, and that every non-backbone area must contain a router that has a physical or logical connection to Area 0.
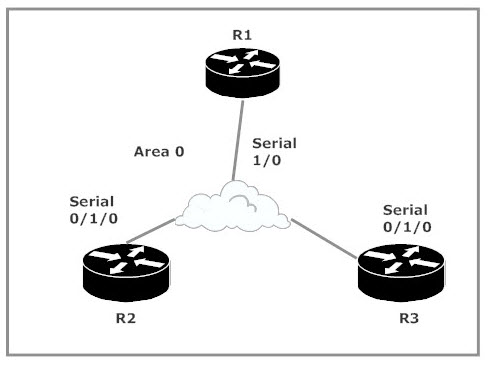
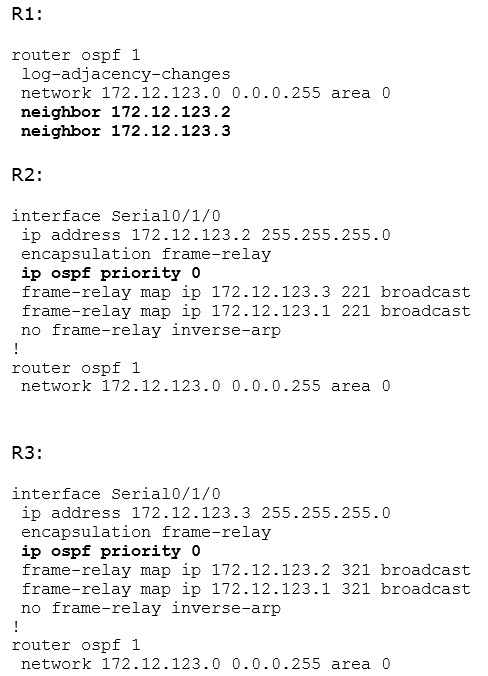
Area 0 is generally found at the center of an OSPF network, and the following network will be no exception. We’ll begin by placing the serial interfaces of R1, R2, and R3 into the 172.12.123.0 /24 network, our Area 0 for this lab. As with any hub-and-spoke OSPF network, the spokes will be disqualified from participating in the DR/BDR election via the ip ospf priority command and the hub will be configured with neighbor statements.
We trust our config, but we always verify — in this case, with show ip ospf neighbor.
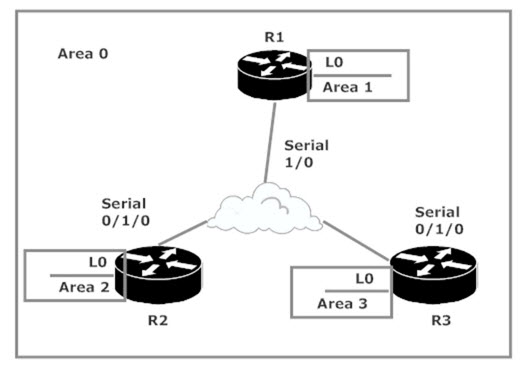
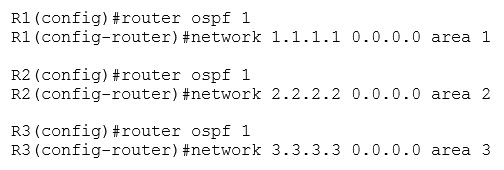
R1 sees both R2 and R3 as DROthers (Other Than DRs, that is), which is exactly what we wanted. I created a loopback on each router prior to this lab starting, using the router number for each octet along with a /32 mask. We’ll introduce those to OSPF by placing them into a non-backbone area, using the router number as the area number.
Let’s check the OSPF table on each router.
Each router now has a route to the loopback networks on the other two routers. These routes are marked O IA, indicating an OSPF inter-area route. With these new areas, each router in the network becomes an Area Border Router (ABR), since each router now borders Area 0 and a non-backbone area.
It’s pretty easy to spot ABRs in a three-router network, but as you add route and routers to your network, it becomes easy to miss an ABR. You can always verify whether a router is an ABR with show ip ospf. This command gives you a ton of output, so I’m showing you only the first seven or eight lines to show you where to look for the ABR info.
To demo OSPF stub and total stub areas properly, we need one more router and a few more routes. R4 shares the 172.12.34.0 /24 broadcast network with R3, a segment we’re now bringing into the lab.
Let’s verify those adjacencies, and if all is well, have a look at R4’s OSPF route table.
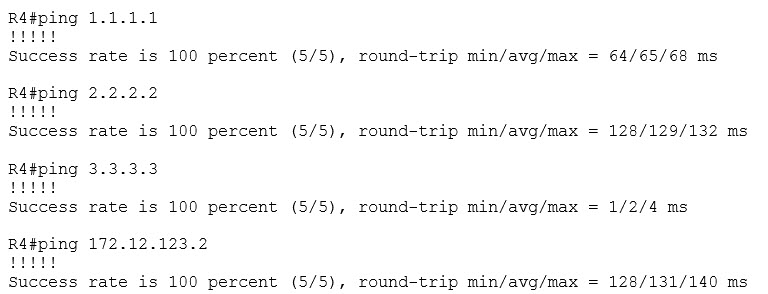
These routes are what we expect to see, but just to be sure we have connectivity, let’s send some pings to a host on each segment.
Looks good! Before we proceed, though, let’s have another look at R4’s OSPF table.
There’s nothing technically wrong with this table; after all, we were just able to ping a host on each route. Thing is, the next-hop IP address for every route is 172.12.34.3. That’s actually the only next-hop address for any packets leaving R4, so we could add a hundred OSPF routes to R4 and the next-hop address would be 172.12.34.3. Why have a collection of routes in the table when it would be faster to have just one? After all, the next hop is always going to be — sing along with me — 172.12.34.3!
Let’s keep that in mind as we head to the next part of this lab, where we’ll perform a little OSPF route redistribution, do some ASBR spotting, and keep a close eye on R4’s OSPF table.
CCNP ROUTE OSPF Lab: Part 2
See you there!
Chris B.


